
The 15 Golden Shots Every Event Photographer Needs to Know
The General Rules
In fact, 93% of event organizers believe that visuals are essential for promoting events, and social posts with images get over twice the engagement of text-only posts.
At Film8, we believe the golden rule of event photography goes beyond aesthetics. It’s rooted in awareness and empathy. To capture meaningful moments, you need to be present without being intrusive. The best event photographers learn how to disappear into the crowd while still catching the moments that matter.
That means blending into the environment and letting people be themselves. Forced smiles and awkward posing often fall flat while real emotion is found in laughter, nervous glances, unguarded hugs, and eye contact. The less you interfere, the more authenticity you capture.
Equally important is knowing when not to take a photo. Respecting the moment, especially during emotional speeches, private exchanges, or ceremonial moments earns trust. Being discreet and intentional helps you gain access without disrupting the experience.
Another key aspect is following the energy. Great event photography isn’t reactive, it’s anticipatory. Instead of photographing what just happened, you learn to read the room: where the toast is about to begin, where laughter is bubbling up, where someone is turning to hug a friend. Your eye should always be one step ahead.
The 15 Golden Shots
Below is a comprehensive guide to the 15 essential shots for any event – from corporate conferences to galas, trade shows, and festivals. For each, we explain what to capture and tips to get it right. Use this as a checklist to ensure your next event’s photography delivers maximum impact.
1. Venue and Décor Before Guests Arrive
What to Capture: Photograph the event space pre-crowd, showcasing pristine setups: think wide-angle shots of the empty venue, stage, or ballroom, plus close-ups of décor details (centerpieces, lighting, signage, branded backdrops). Shoot from multiple angles – including an elevated vantage point – to highlight the ambiance and scale. Don’t forget any unique branding elements (e.g. company logo projections, sponsor booths, step-and-repeat banners).
Pro Tip: Capture venue shots early, before guests enter. Turn off harsh overhead lights and use natural light or event mood lighting if possible to preserve the intended atmosphere. Composing a wide shot that includes branded signage or stage screens will also double as a proof of event branding for sponsors.

A venue shot at Semper NutriSemp Appreciation Meeting in Stockholm, Sweden
2. Greeting and Arrival Moments
What to Capture: The event’s first moments are full of anticipation – be there to document them. Snap attendees as they arrive: walking through the entrance, registering at the check-in desk, picking up badges, or greeting each other with smiles and handshakes. These can be candid shots of people coming through the doors or posed photos at a welcome backdrop. Include any branded welcome signs or entry arches in the frame if possible. Aim to convey the energy of kickoff: the bustling registration table, the excited faces, even the queue outside the venue.
Tip: Station a photographer near the entrance as doors open. Use a fast shutter to freeze motion and capture crisp expressions. If there’s special entertainment at the welcome (e.g. a mascot, greeter, or decor element like smoke machines or lighting at the entry), be ready to include it in the frame to amplify the sense of occasion.

An arrival moment captured at Lynk & Co’s Z10 launch event in Gothenburg, Sweden
3. Crowd and Atmosphere Shots
What to Capture: Don’t just tell attendees your event was big – show it. Take wide-angle photos that capture the scope and energy of the crowd. This could be a packed conference hall during a keynote, a bustling trade show floor, or a festival crowd from the stage’s perspective. If possible, get a high vantage point (balcony or stage edge) to photograph the full audience or expo hall. Also look for dynamic crowd moments: people dancing, cheering, raising hands for questions, or engaged in activities. For outdoor events, consider a drone or elevated shot to encompass the entire scene. The goal is to illustrate magnitude and excitement.
Tip: Capture both scale and emotion. Take one or two expansive shots that get everyone in frame (for scale), then zoom in slightly for shots of sections of the crowd visibly laughing, clapping, or interacting (for emotion). Make sure exposure is correct for large groups (often the stage lights can cause backlighting – adjust your settings or angle to properly expose the faces). Keep an eye out for colorful elements (audience holding up swag, or waving hands) that add life to the image.

A crowd shot taken at the DKP Welcoming Event in Stockholm, Sweden
4. Speakers and Stage Presentations
What to Capture: Whenever there’s a speaker on stage or a panel discussion, be poised to shoot it from the best angle possible. Key shots include the keynote speaker mid-speech (get both wide shots showing the stage and environment, and close-ups of the speaker’s expression). If there’s a panel, capture the group interacting. Include any presentation visuals or stage branding in the frame for context. Also look for behind-the-podium moments: a speaker gesturing, audience in the background, or a side-stage angle. Essentially, document the thought leaders in action. If there are multiple speakers throughout the event, aim to photograph each one so the marketing team has a record of all who took the stage.
Best Practices: Use a telephoto lens to get crisp close-ups of speakers’ faces from afar, and a wide lens for full-stage context. Capture a mix of expressions – a passionate gesture, a moment of laughter, a thoughtful pause. Make sure any projector screens or backdrop branding is not washed out; adjust exposure so both the speaker and screen content are visible. If lighting is tricky (dark auditorium with bright spotlight), consider spot metering on the speaker to get the right exposure.

A speaker’s presentation at Quakka’s company event in Gothenburg, Sweden
5. Audience Engagement and Reactions
What to Capture: Swing your camera around from the stage and point it at the audience. Photographs of attendees fully engaged in the event are essential. Snap shots of people laughing, clapping, and listening intently during speeches. Catch moments of surprise or excitement – like a big laugh at a keynote joke or a crowd applauding a performer. Also capture interactive moments: attendees asking questions in a Q&A, taking notes, or participating in live polls or activities. Aim for genuine expressions – eyes on the stage, smiling faces, perhaps a standing ovation if one occurs. These reaction shots can be close-ups of individuals or small groups within the audience, as well as wider shots that show context (like a whole table at a gala reacting together).
Tip: Pay attention to moments likely to generate reactions (punchlines, big announcements, performances) and have your camera trained on the crowd then. Use burst mode to catch the peak of a reaction (e.g. the exact moment of laughter). For candid audience shots, a longer lens (70-200mm) is useful so you can capture faces without being intrusive. If possible, move around – get one shot from the back of the room showing many people clapping, and a few from up close on the sides capturing individual expressions.
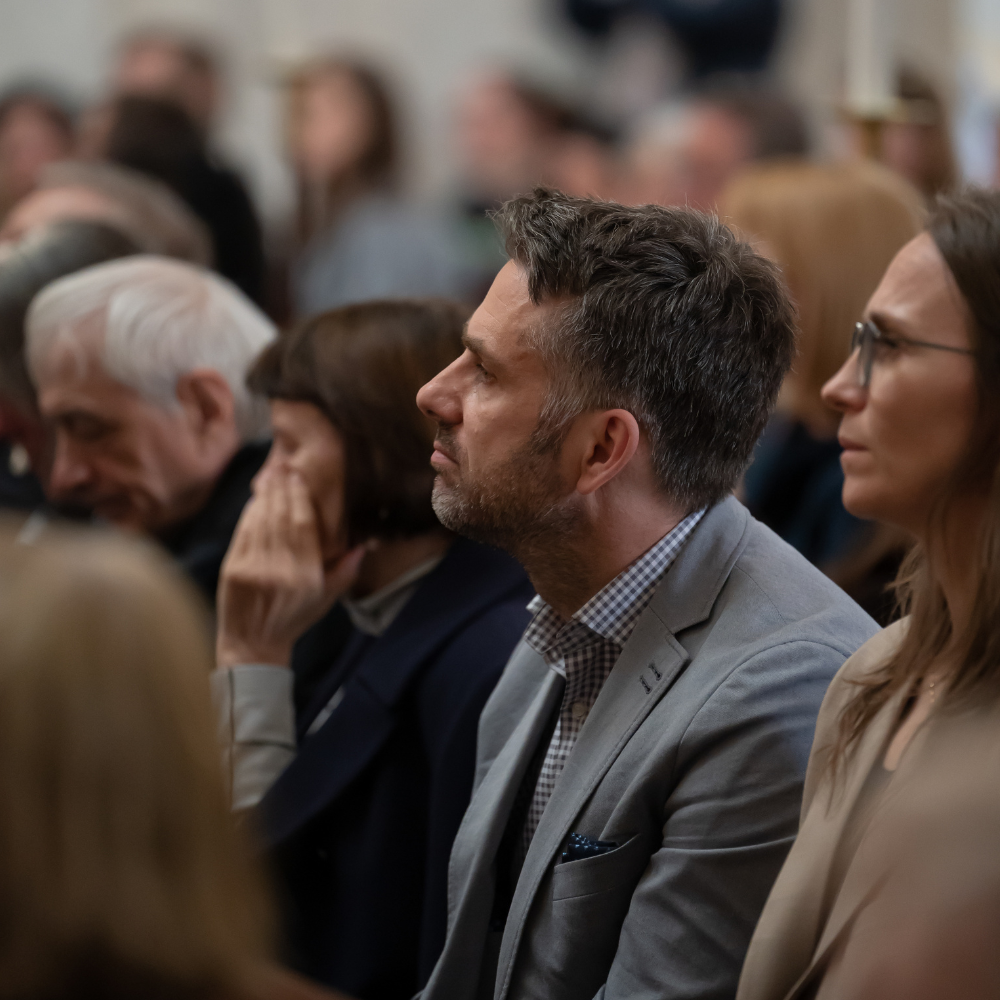
An audience engagement shot taken at the Fundraising Concert for Ukraine in Stockholm, Sweden
6. Networking and Candid Interaction Shots
What to Capture: Some of the most heartwarming and authentic event photos are the candid ones of attendees interacting. During coffee breaks, networking sessions, or cocktail hours, roam with your camera to catch people in natural conversation. Look for handshakes, people exchanging business cards, groups laughing together, or new connections being made. Capture small clusters of 2-5 people engaged with each other – smiling, talking, maybe gesturing enthusiastically. You can also include environmental context (e.g. people chatting near a sponsor booth or at a lounge area) to show the event setting. It’s okay if these are somewhat posed (e.g. a quick group photo of new friends with arms around each other), but aim for unposed moments that feel genuine. Essentially, you’re documenting the networking and community-building aspect of the event.
Best Practices: Use a moderate zoom lens (e.g. 24-70mm) so you can shoot from a slight distance without interrupting conversations. Keep an eye on body language – a handshake, a group leaning in together, a high-five – those make for compelling shots. If people notice you, you can smile and nod but try to avoid making them pose; the aim is to keep it candid. Also, be mindful of diversity and inclusion here: capture a mix of attendees in conversation to reflect a welcoming environment. As event marketers advise, showing diverse participants interacting signals that the event is inclusive and welcoming to all.

A networking moment captured at the Mitt Bland Oss Book Launch Event in Stockholm, Sweden
7. VIPs and Special Guests
What to Capture: If your event has VIP attendees or special guests (think keynote VIP speakers, industry leaders, celebrities, government officials, or the company’s top executives), plan to photograph them prominently. This might include candid moments of a VIP mingling or an official posed shot. Key images could be: a VIP on the event floor interacting with others, a handshake between a VIP and the host or sponsor, or a portrait-style shot of the VIP at the event backdrop. Also capture any exclusive moments involving VIPs – for example, a ribbon-cutting by a dignitary, or a meet-and-greet line. Make sure you know who the VIPs are (get a list with names and appearance if possible) so you can seek them out. It often helps to briefly introduce yourself as the photographer and ask for a quick photo if appropriate – most VIPs expect to be photographed at events.
Tip: Coordinate with the event planner or PR team beforehand to identify VIPs and their schedule. If possible, arrange a brief photo op (e.g. the VIP with the event host or sponsor in front of a banner). Use a fast shutter since VIP moments can be fleeting, and be respectful – get the shot efficiently without overly imposing on their experience. A small off-camera flash can help in dark venues to properly illuminate VIPs, but be careful not to disturb them during sensitive moments.

A VIP shot taken at the Semper NutriSemp Appreciation Meeting in Stockholm, Sweden
8. Sponsor and Branding Highlights
What to Capture: Sponsors invest in events for exposure – your job is to capture that exposure in action. Photograph all instances of sponsor branding: sponsor banners, signage on stage, branded booths or activations, logos on screens, and swag or products provided by sponsors. But don’t just shoot the signs by themselves – capture people interacting with them. For example, get a photo of attendees at the sponsor’s expo booth, a speaker on stage with the sponsor logo visible behind them, guests using a sponsor’s product sample, or smiling attendees holding sponsor-branded swag bags. Plan a “must-capture” list of branded moments: the step-and-repeat backdrop with sponsor logos (ideally with guests posing in front of it), any branded lounge or photo booth, sponsored giveaways, and product demos. Essentially, show that the sponsor’s presence was integrated and engaging, not just a static logo.
Pro Tip: Before the event, walk the venue to note where sponsor logos and activations are located, and plan to visit each with your camera during peak attendee interaction times. Use depth of field creatively – for instance, you can focus on a sponsor’s logo in the foreground with a bustling crowd slightly blurred behind it, or vice versa, to naturally draw attention to the branding. Always take multiple shots (wide and close) of each branded element. If the event has a step-and-repeat banner or dedicated photo op area, spend some time there capturing groups that stop for photos – these often end up being shared online by attendees and give sponsors extended visibility.

A branding highlight captured at Lynk & Co’s Z10 launch event in Gothenburg, Sweden
9. Award Ceremonies and Recognition Moments
What to Capture: Many events feature some form of award, honor, or milestone moment – make sure you’re on the scene to capture it. This could be an awards gala handing trophies to recipients, a certificate presentation on stage, a ribbon-cutting for a new facility at a conference, or even a simple speaker gift exchange. Key shots include: the actual moment of hand-off (e.g. a presenter shaking hands with the award winner while holding the award), the recipient’s joyful reaction, posed group photos of winners with their awards, and any celebratory gestures (champagne toasts, trophy raise, confetti, etc.). If multiple awards are given, photograph each recipient. It’s wise to confirm when and where these moments will happen (coordinate with the agenda) so you can be in position – these moments are usually quick but highly photographable.
Tip: Use continuous shooting mode to ensure you get the exact moment of handshake or award hand-off (there’s often a sweet spot where both people are smiling and facing the camera). If possible, scout the stage lighting beforehand and dial in settings to avoid motion blur – often these ceremonies go fast. After the on-stage shot, politely wrangle the awardee and presenters for a quick posed photo with the award; this controlled shot can sometimes be clearer and more usable for press than the live-action one. Lastly, capture some crowd reaction during the award moment (audience clapping or a standing ovation) to pair with the winner’s photo for a complete story.

An award ceremony moment captured at the DKP Welcoming Event in Stockholm, Sweden
10. Team and Group Photos
What to Capture: Gather the key groups for some purposeful photos. Common group shots include: the organizing team (event staff or volunteers) posing together, the executive team or board of directors if it’s a corporate event, groups of award winners or speakers, and VIP group shots (e.g. all honorees in one frame). These are usually posed rather than candid – coordinate a time (often at the end or a natural break) and location for a quick group photo. Set up in front of an attractive backdrop or event stage. Ensure everyone is visible (use a small ladder or elevated position for very large groups if needed). Also consider informal group shots among attendees: for example, a table of colleagues at a gala smiling for the camera, or a reunion of alumni group at a conference. Essentially, anytime there’s a notable cluster of people who share a connection, it’s worth a photo. Don’t shy away from encouraging, “Let’s get a group photo!” when appropriate.
Tips: When arranging group photos, be efficient – gather people quickly and take multiple frames so no one is blinking. Communicate clearly (“Everyone, eyes here, big smiles!”). For very large groups, take multiple shots and consider a panorama or composite if you can’t fit everyone in one frame. If lighting is low, use a flash or find a brighter area, since you want everyone’s face clearly visible. And always take one “silly” shot after the formal one; surprisingly, those sometimes capture more genuine smiles and can be fun content for social media.

A group photo taken at the Semper NutriSemp Appreciation Meeting in Stockholm, Sweden
11. Entertainment and Performances
What to Capture: Many events incorporate some entertainment or live performance element – it could be a live band at a gala, a cultural dance at an awards dinner, a DJ at a festival, or even just a fun activity (magician, comedian, etc.) during a conference social. Whenever entertainment is on, treat it like a mini-event within the event. Photograph the performers on stage, including wide shots that show the production (lighting, stage effects) and close-ups that capture their expressions or costumes. Also, capture the crowd enjoying the performance – people dancing, singing along, or clapping to the music. If there are special effects (confetti, pyrotechnics, etc.), be ready to shoot at the climax. Essentially, document the showmanship and fun factor. Even if it’s a small-scale act like a caricature artist in a corner, get shots of attendees engaging with it (e.g. someone laughing as their caricature is drawn).
Tips: Performance lighting can be tricky (strong colored lights, fast movement). Use a fast lens and high ISO to freeze action, and shoot RAW to adjust colors later if stage lighting casts a tint. Try different angles – from the front for a classic view of the act, or from backstage/side for a dramatic silhouette of the performer against the crowd. Anticipate big moments (finale pose, big laugh lines if it’s comedy, drops in music if it’s a DJ) to capture peak energy. And remember to turn around and get audience shots during performances, as those reactions complete the story of the entertainment’s impact.

A live performance at the Fundraising Concert for Ukraine in Stockholm, Sweden
12. Food, Drink, and Catering Highlights
What to Capture: If your event has a significant food or beverage component (and most do, even if just coffee breaks), take some appetizing photos. This can include the beautifully arranged catering spreads – e.g. a table of artfully plated appetizers, a signature cocktail being poured at the bar, a fancy dessert display, or even the dinner tables set with meals. Also capture people enjoying the F&B: attendees toasting with drinks, a candid of someone savoring a bite, or smiling servers offering hors d’oeuvres. Don’t forget any themed or unique culinary items: branded cookies or a cake with the company logo, a food station with the sponsor’s name, etc. Even capturing the ambiance of a networking lunch (people seated at tables conversing with plates of food) can be useful. Essentially, shoot anything that reflects the hospitality and culinary experience of the event.
Tips: Shoot food photos with an eye for presentation – get close-ups with a shallow depth of field to make the dish pop against a softly blurred background. Find the best-lit spot (even if you have to move a plate near a window or a well-lit area briefly). For drinks, capturing the clink moment or the pour with some motion can bring it to life. When photographing people eating or drinking, be careful to capture flattering moments (maybe just as they toast or smile, not mid-bite or with mouths full). And if you have time pre-event, photograph the table setups and centerpieces – it’s easier to get pristine shots before they’re disturbed by hungry guests.
13. Interactive Activities and Exhibitor Demos
What to Capture: Many events include interactive elements – make sure to photograph attendees in action. This could be attendees trying out products at exhibitor booths, a hands-on workshop, a tech demo (VR headset station, for example), games or competitions at a festival, or creative engagement stations (like a graffiti wall or a photo booth). Focus on people actively participating: a person test-driving a gadget, a small group gathered around a demo with curious looks, an attendee getting a product sample or swag from a booth, or participants engaged in a workshop exercise (writing on sticky notes, building something, etc.). If it’s an expo, get shots of the most popular booths with crowds around them. If it’s a brand activation, capture the entire setup plus the reactions of those involved. Essentially, highlight any hands-on experiences the event offers.
Tips: Interactive moments can be spontaneous, so stay alert during breaks and expo times. Use a faster shutter speed to freeze motion if people are moving (for instance, someone tossing a game beanbag or a robot arm moving in a demo). Try to frame shots such that any branding (like the exhibitor’s name or product being demonstrated) is visible to give context. If one particular activity is a big hit (big crowd around it), capture it from multiple angles – wide shot to show the crowd, and close on individuals’ reactions. Don’t be afraid to ask someone to redo a quick action for the camera if you missed it (“That looked cool, mind if I get a photo of you doing that once more?”) – most attendees are happy to oblige because they, too, often want a picture of themselves doing the activity.
14. Behind-the-Scenes and Setup Glimpses
What to Capture: These are shots that attendees normally don’t see, but can add depth to your event story. Think about photographing the preparation and the people who make the event run. This could be staff arranging centerpieces before doors open, the AV team setting up lights and sound, crew members unloading equipment, or speakers prepping backstage (maybe a candid of a panel reviewing notes in the green room). Also consider behind-the-scenes of fun elements: chefs in the kitchen plating meals, or volunteers stuffing goodie bags before registration. During the event, “backstage” shots like a tech monitoring the control booth, or an organizer peeking through curtains at the stage, can be compelling. Essentially, capture a few images that peel back the curtain on the event production. These shots are usually candid and taken off the main stage.
Tips: Take these mostly during low- or no-attendee times (before doors open, after closing, or backstage where attendees aren’t allowed) to avoid confusion. Use available light and try not to interfere; capture candid moments of work rather than posing people. A shallow depth of field can be nice here – e.g., focus on a microphone being tested with the empty stage blurred behind, symbolizing preparation. Always check with the event organizer about sensitive areas: e.g., if something shouldn’t be photographed for security or surprise reasons (maybe a top-secret product before reveal), avoid that. Otherwise, a handful of behind-the-scenes snaps will round out your story and delight the team that worked so hard.
15. Closing Moments and Farewell Shots
What to Capture: As the event winds down, keep your camera out – the final moments are just as important as the opening. Capture attendees as they depart: smiling faces exiting the venue, people high-fiving or hugging goodbye, and guests picking up swag bags or coats at the door. If there’s a formal closing, photograph it (e.g. a closing speech on stage, or a final group toast). Also look for end-of-event rituals: maybe a big “thank you” slide on screen and applause, or an organizer at the door thanking guests. Another great shot is the aftermath once attendees leave – for instance, a wide shot of the venue empty with scattered balloons or an event banner that reads “Thank you for coming!” (This can pair nicely with the earlier pre-event shot to show before-and-after). Essentially, document the happy goodbyes and the sense of completion.
Tips: In the final minutes, position yourself by the exit. Use a friendly approach – many people will gladly smile for a photo when they’re in a good mood after an event. If they’re carrying swag or awards, compose shots to feature those items. For a creative touch, you might capture a motion blur of people walking out, with the event banner above them (to signify movement and end). Don’t pack up your gear the minute the schedule ends; often the best candid goodbye shots happen just after the formal program is over. Finally, consider snapping a “wrap-up” shot of the now-empty venue or the sunrise after an all-night festival teardown – images like that can poetically signal the end of the event (these are sometimes used on social with captions like “And that’s a wrap!”).

A closing moment at the DKP Welcoming Event in Stockholm, Sweden
What Film8 Can Do For You?
At Film8, we don’t just take pictures, we observe, anticipate, and shape visual narratives that last. Whether we’re covering a corporate event, a documentary-style wedding, or an intimate launch party, our goal is to create a gallery that feels like a true reflection of the event — not just a collection of moments, but a story worth revisiting.
Ready to capture your next event? Let’s talk!